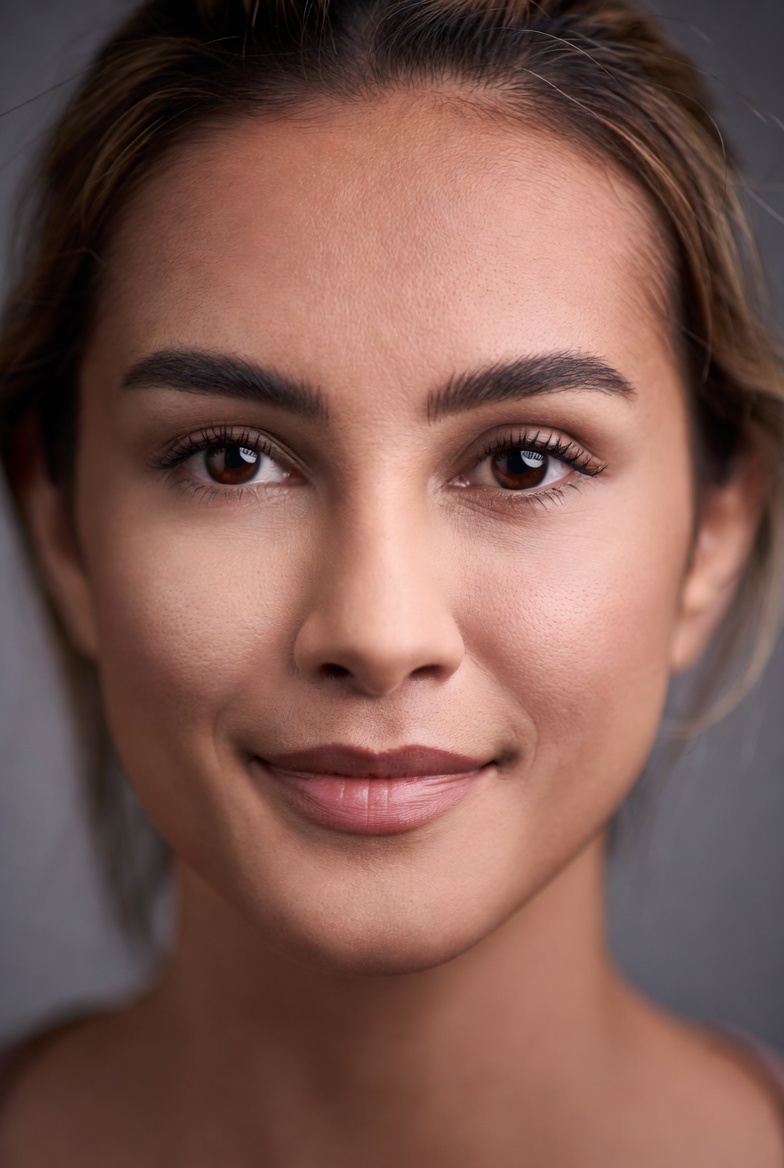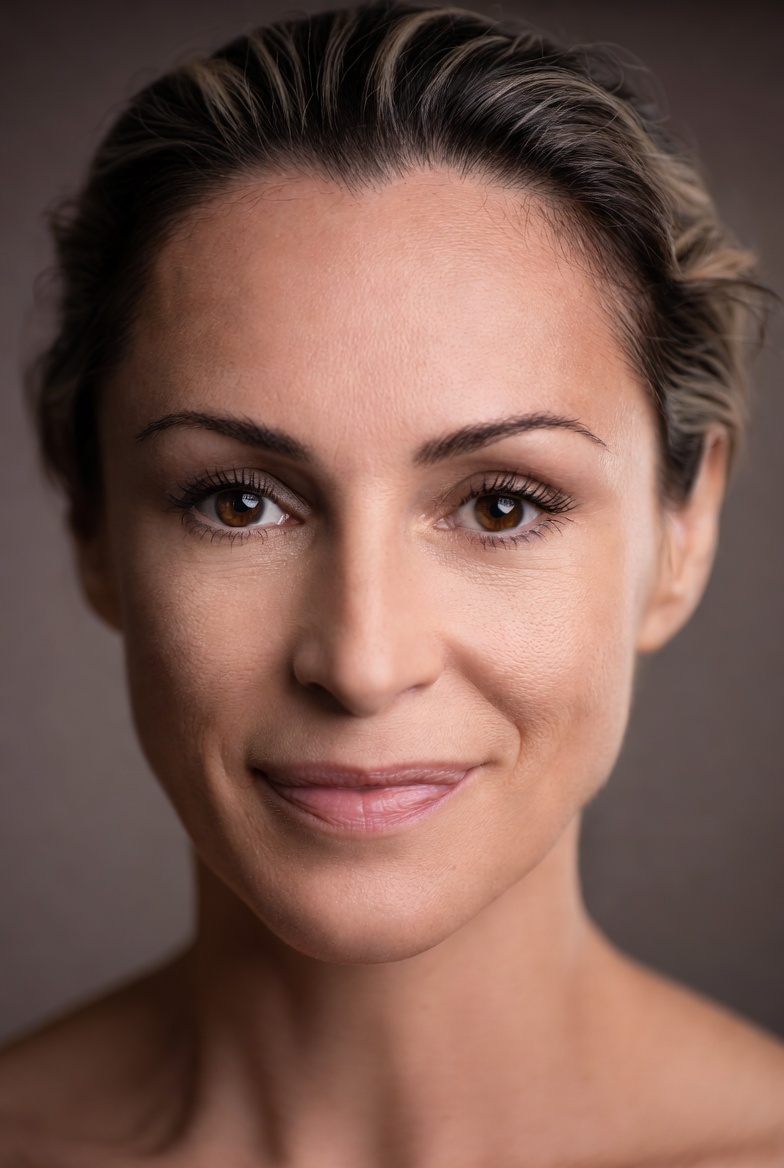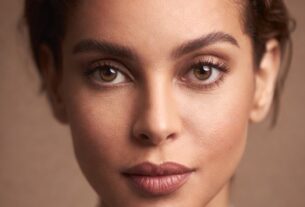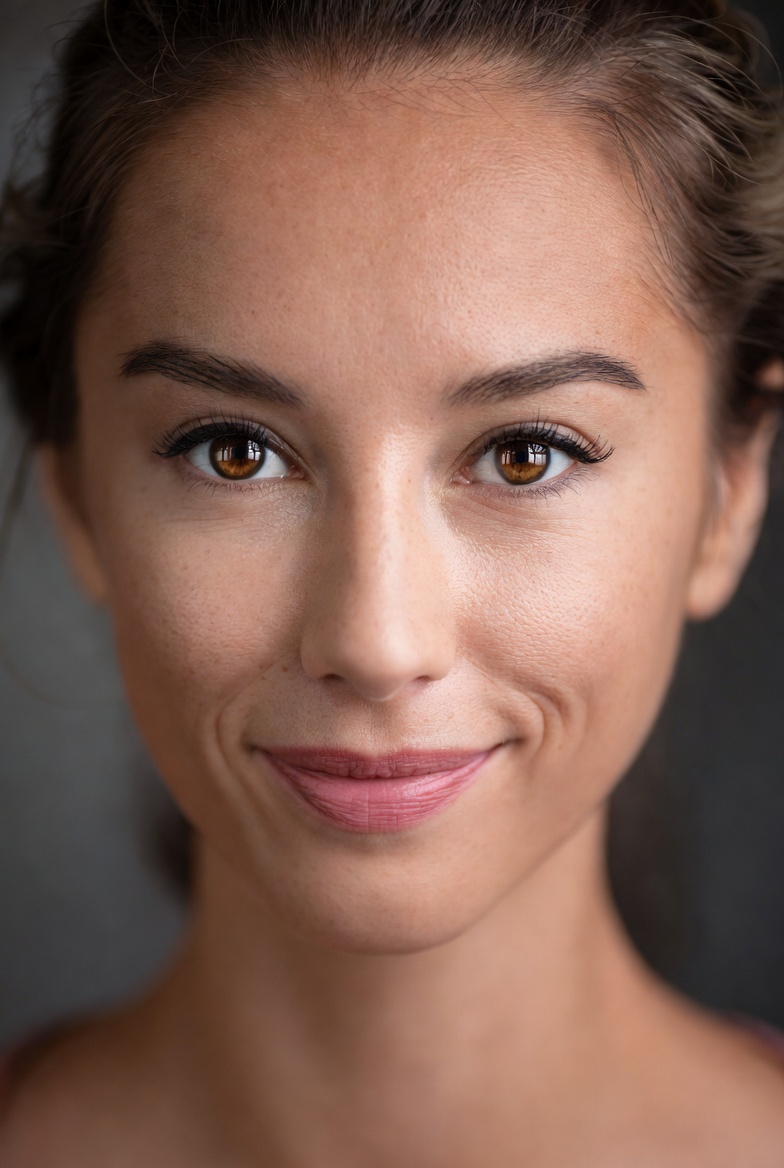
A studio headshot is one of the most practical image types you can generate with AI because the goal is clear: a believable face, professional styling, controlled lighting, and a distraction-free background. This page focuses on a studio headshot prompt designed specifically for an adult woman, built around Rembrandt lighting an iconic setup that creates a small triangle of light on the shadow-side cheek. The result is flattering dimension without harshness, which is exactly what you want for LinkedIn-style portraits, speaker bios, team pages, and pitch decks. Unlike flashier cinematic looks, a clean headshot is “evergreen”: it doesn’t date itself with trendy color grading, exaggerated blur, or surreal elements.
The visual concept here is deliberately minimal. A seamless warm-gray backdrop gives you separation without pulling attention away from the subject. Muted wardrobe tones keep color harmony simple and reduce the risk of odd fabric artifacts. The mood is calm and confident professional, but not stiff so it works for modern roles like product designers, consultants, founders, recruiters, and creatives who still need a business-ready image. By choosing studio language (sharpness, catchlights, minimal shadow noise) you guide Midjourney v6, Flux, and SDXL toward the cues of real portrait photography: controlled light falloff, clean tonal transitions, and natural skin texture.
Rembrandt lighting is especially useful when you want the face to read well at small sizes (profile icons, bio thumbnails). It shapes the cheekbones and jawline while keeping the eyes bright. Combined with a moderate aperture like f/4, you get crisp facial detail with enough depth of field to keep the entire face in focus reducing those common AI issues where eyelashes are sharp but the nose or ear looks strangely soft. If your goal is a believable, employer-friendly portrait that still feels modern, this prompt DNA is a strong baseline.
The AI Prompt
Why This Prompt Works
“Photorealistic studio headshot” sets the model’s expectations: controlled environment, portrait priorities, and realism. Specifying an adult subject keeps the request unambiguous and safe. Skin cues like “pores” and “fine vellus hair” encourage believable texture without drifting into waxy smoothing. The “seamless warm-gray backdrop” is a proven studio default: it avoids harsh contrast, reduces banding, and makes edge separation easy for hair and shoulders.
The camera choices matter. An 85mm lens is a portrait standard because it flatters facial proportions, while f/4 helps keep both eyes and most of the face in focus useful for consistent headshots. “Studio sharpness” and “clean catchlights” direct attention to the eyes, which is where realism is judged first. Rembrandt lighting language (“pattern,” “soft key,” “gentle fill”) communicates structure: you want sculpting shadows, but not dramatic darkness. Finally, “natural color rendition” helps prevent overly orange skin tones, and “minimal shadow noise” reduces gritty artifacts in the darker cheek and neck areas.
Tips for Customization
To tailor the portrait to different professional vibes, make small, specific swaps. First, adjust the background tone: change “warm-gray backdrop” to “cool light-gray backdrop” for a crisp tech-company feel, or “deep charcoal backdrop” for a premium executive look (keep the “gentle fill” so shadows don’t crush). Second, modify the wardrobe cue: replace “neutral wardrobe” with “tailored blazer” for formal, or “smart casual knit sweater” for friendlier branding both still photograph well in studio lighting. Third, refine the camera and crop: keep 85mm but add “tight crop from shoulders up” for a classic headshot, or “slightly wider crop including upper torso” for websites that need breathing room around the subject. These changes preserve the realism while steering style and intent.
Common Issues & Fixes
If the face looks too airbrushed, reinforce texture by adding “natural skin micro-texture, subtle under-eye detail” and keep “natural color rendition.” If eyes look dull or uneven, strengthen “clean catchlights” and add “even illumination across both eyes.” For strange hair edges against the backdrop, increase separation with “subtle rim light outlining hair” while keeping the overall studio softness. If the lighting becomes too dramatic, reduce contrast by changing “Rembrandt lighting pattern” to “soft Rembrandt lighting with higher fill ratio.” And if the expression feels stiff, swap “calm confident expression” for “relaxed approachable expression” to get more natural facial tension.
Frequently Asked Questions
Q1: Can I make this headshot look more editorial but still professional?
Yes add “editorial portrait styling, subtle film grain” while keeping the clean background and Rembrandt setup.
Q2: What lens should I use if I want a slightly wider feel?
Try “50mm lens” for more environment and a less compressed look, but keep “studio sharpness” and f/4 to maintain clarity.
Q3: How do I avoid odd asymmetry in the face?
Add “natural facial proportions, balanced symmetry” and keep the framing simple (centered, shoulders-up) with crisp focus on the eyes.