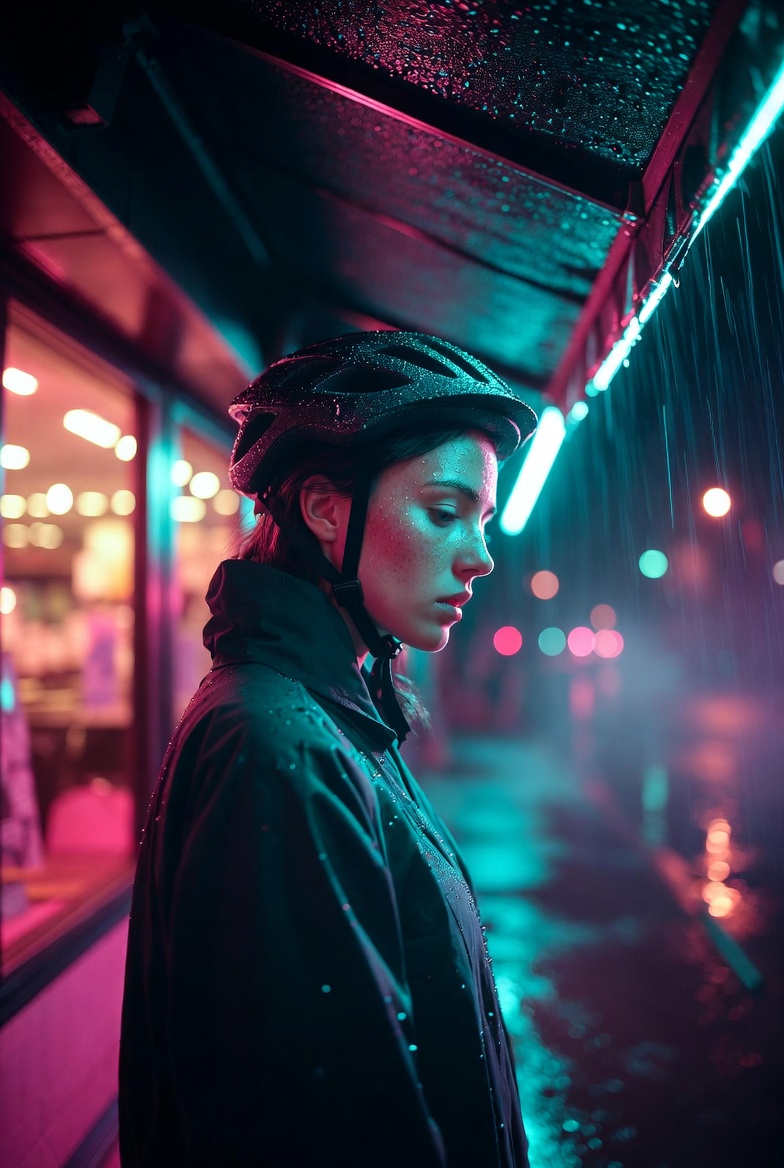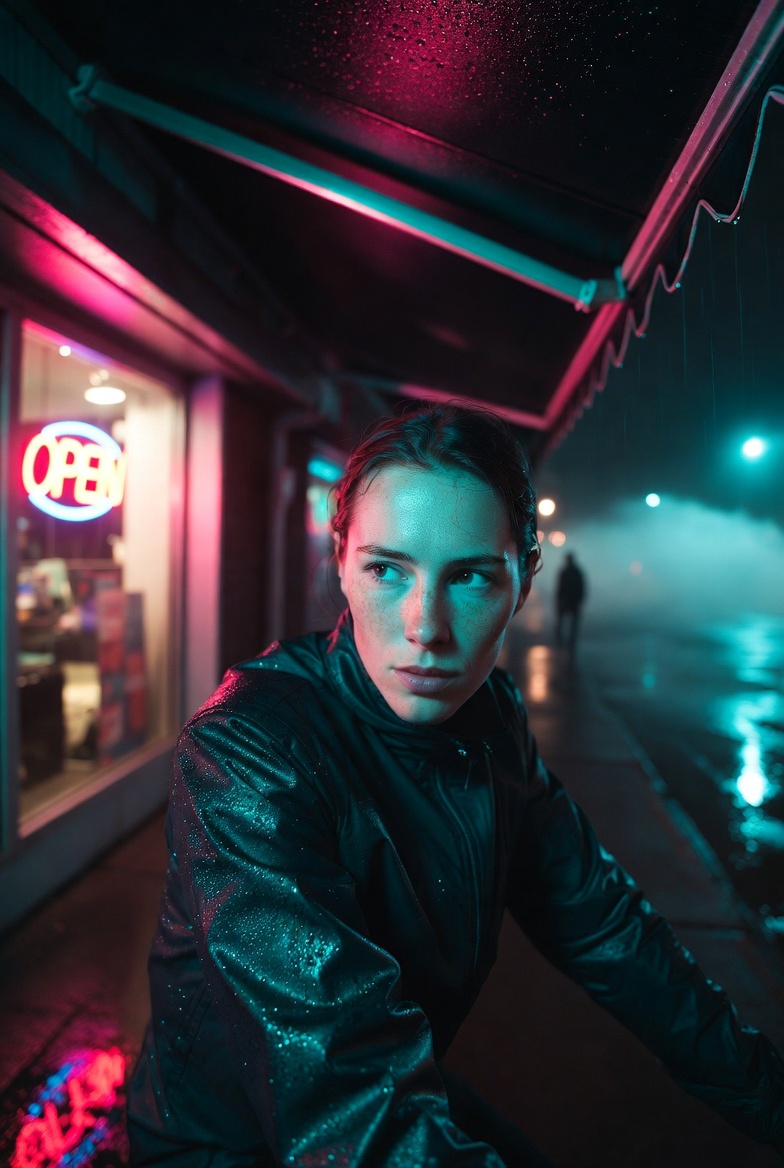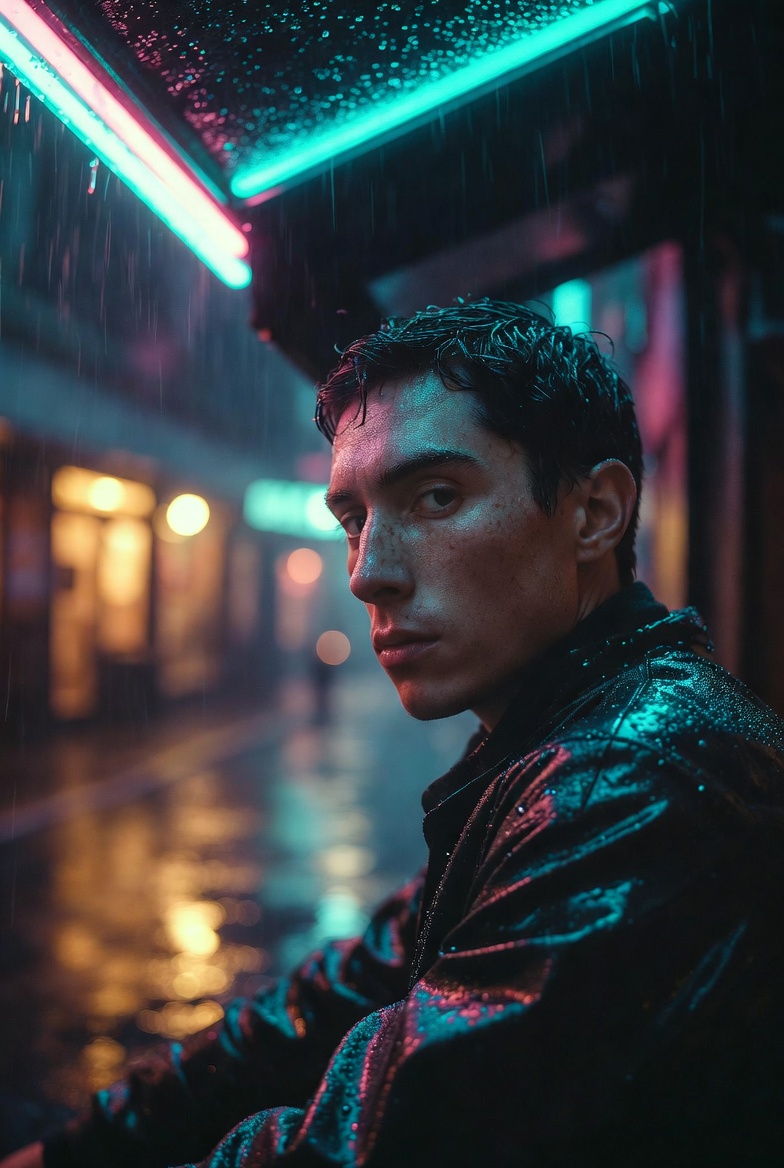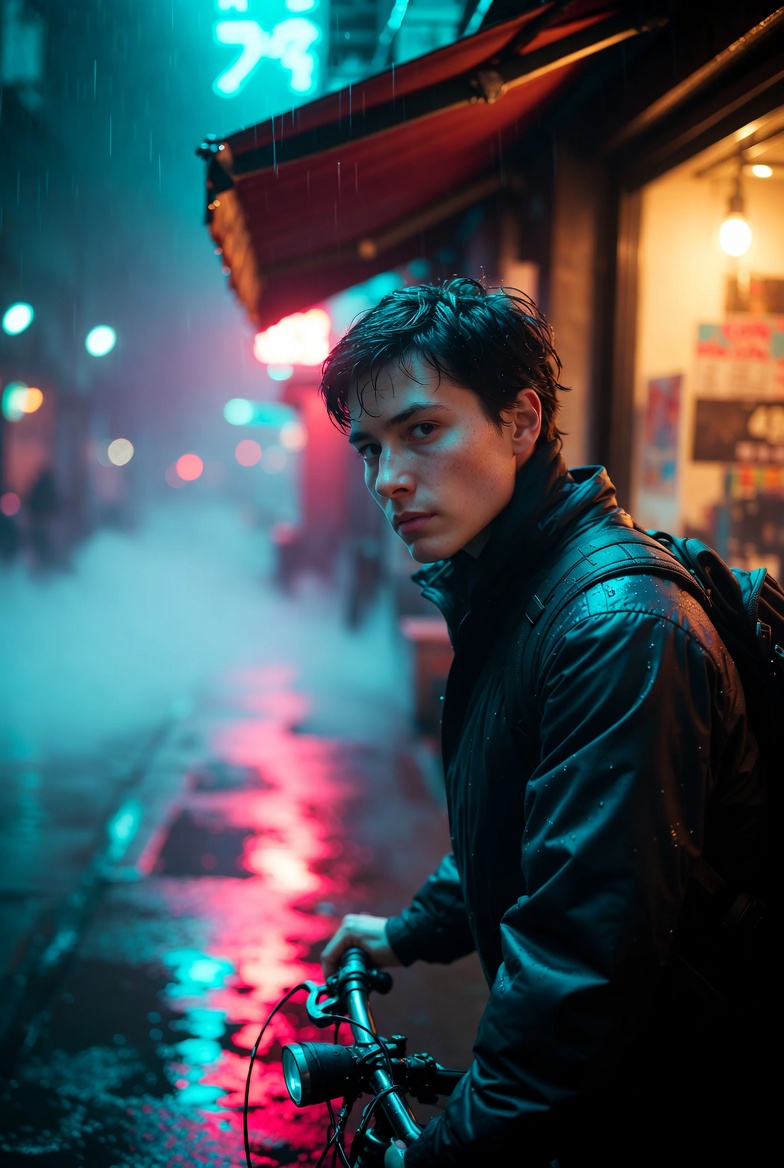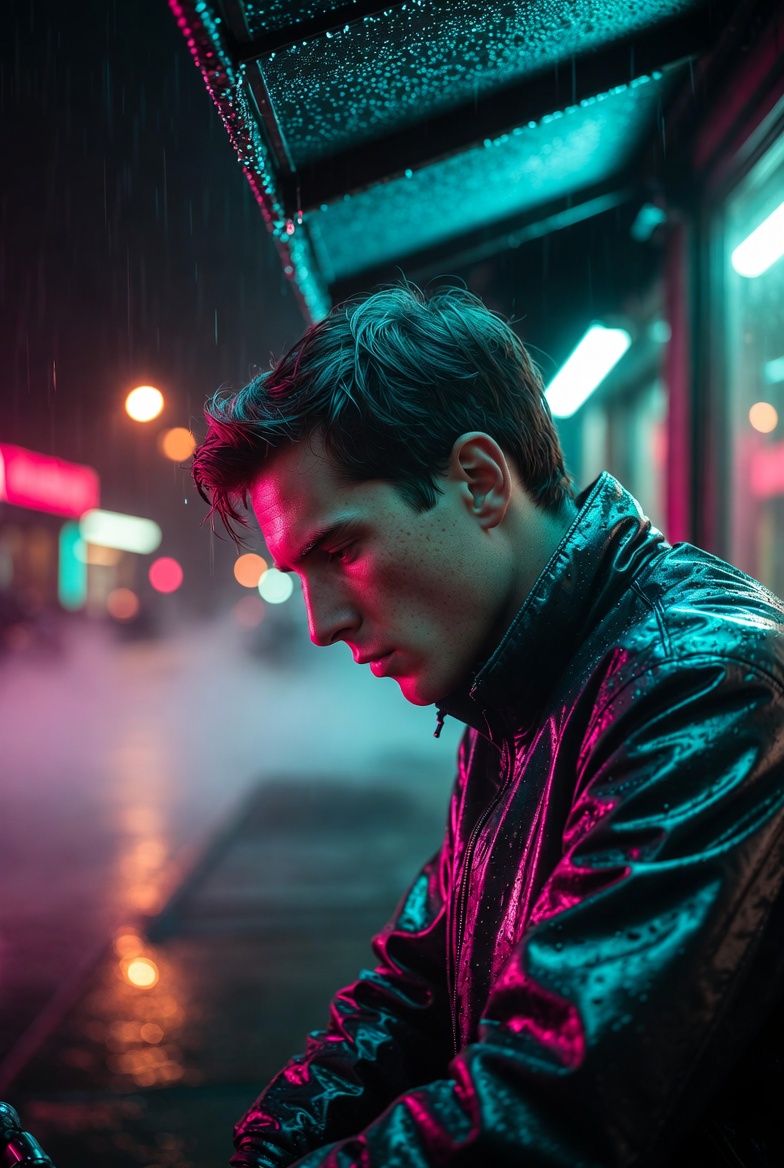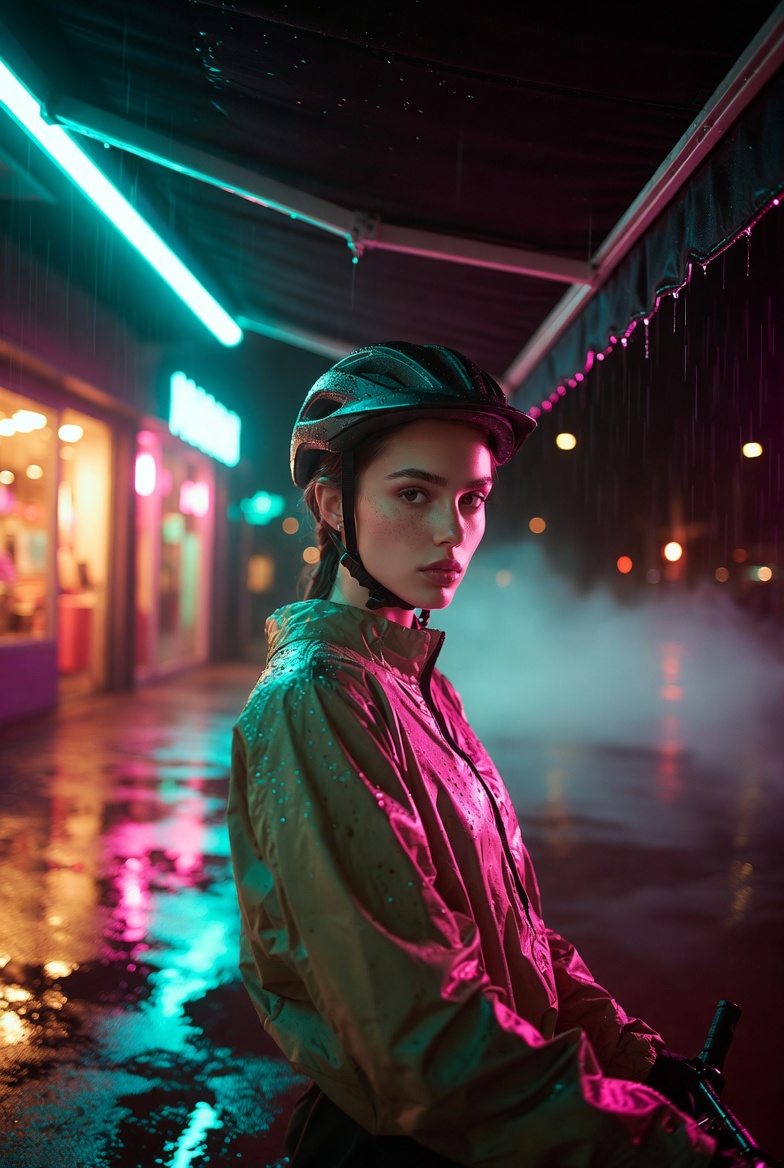
A night street portrait can feel instantly “movie-like” when you combine three ingredients: wet surfaces (for reflections), colored practical lights (for believable neon glow), and a lens choice that compresses the scene while keeping the subject sharp. This page is built around a cinematic street portrait prompt that’s designed to produce photorealistic results in Midjourney v6, Flux, and SDXL without relying on gimmicks. The concept: an adult urban cyclist taking shelter beneath an awning while rain turns the pavement into a mirror. The scene is modern, gritty, and grounded no fantasy props so it works for editorial-style portraits, brand imagery, social banners, and atmospheric profile shots.
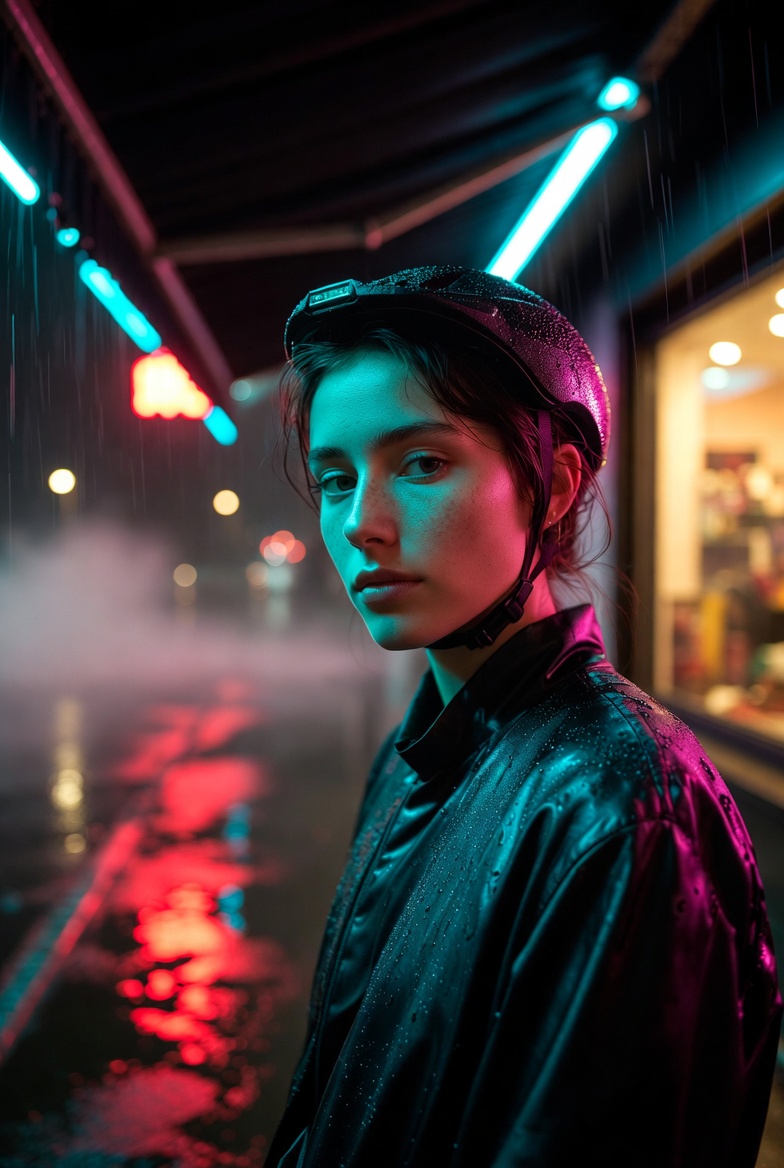
Visually, the “neon rain” setup gives you texture everywhere: micro-droplets on fabric, specular highlights on hair and jacket seams, and smeared reflections across the sidewalk. Those reflective surfaces are the secret to depth. Instead of a flat black background, you get layers: foreground shine, mid-ground subject, and a background haze where distant lights bloom into bokeh. That haze also helps hide clutter and creates a soft separation behind the face especially useful when the model tends to over-detail background objects.
The lighting approach is intentionally realistic: a soft key light from a nearby storefront for flattering facial structure, plus cyan-magenta rim lighting that simulates neon signage spilling into the scene. This combination is cinematic because it mimics how real night streets look on camera mixed color temperatures, strong edges, and gentle roll-off on the skin. The mood is calm but intense: the subject is still, the city is alive, and the rain adds motion without needing action poses. If you want a portrait that looks like a frame from a film rather than a studio headshot, this prompt DNA is a reliable starting point.
The AI Prompt
Why This Prompt Works
The phrase “photorealistic cinematic street portrait” sets a clear target: realism first, film language second. Specifying an adult subject is important for safe, unambiguous portrait generation. “Rain-soaked awning” and “wet pavement reflections” are practical scene anchors that push the model toward believable materials glossy highlights, reflective puddles, and directional specular light. Texture cues like “skin pores,” “subtle freckles,” and “fine water droplets” increase micro-detail without drifting into over-sharpened, artificial skin.
Lens and exposure details “85mm lens at f/1.8” are doing heavy lifting. 85mm creates flattering facial proportions, and f/1.8 encourages background blur, which helps control busy street elements. Composition instructions (“eye-level,” “rule of thirds,” “crisp focus on eyes”) reduce common portrait failures like awkward cropping or sharp ears with soft eyes. Lighting is the cinematic core: “cyan-magenta rim lighting” produces strong edge separation and color drama, while “soft key light from storefront” keeps the face readable and natural. Finally, “HDR,” “ultra-detailed,” and “8k” reinforce clarity, while “natural color grading” and “filmic contrast” prevent the scene from becoming overly saturated or cartoonish.
Tips for Customization
To shift the vibe without rebuilding the whole prompt, swap a few targeted phrases. First, change the mood and palette: replace “cyan-magenta rim lighting” with “warm amber sodium-vapor streetlight with cool blue fill” for a more grounded, documentary feel. Second, adjust the setting realism: trade “neon signage” for “bus stop advertisement glow” or “parking garage fluorescent spill” to get a less cyberpunk, more everyday city look. Third, vary the camera language: keep 85mm but try “f/2.8” for slightly more environmental context, or switch to “50mm lens at f/1.8” if you want the street to feel wider and more immersive. Small changes like these preserve the core photoreal portrait while giving you noticeably different outputs across generations.
Common Issues & Fixes
If faces look slightly distorted, emphasize the facial clarity by adding “natural facial proportions, symmetrical features, clean jawline definition” and keep “crisp focus on eyes.” If the lighting feels flat, strengthen directionality: add “strong back rim light outlining shoulders and hair” and keep the “storefront key light” so the face isn’t lost. If the background becomes too sharp or cluttered, reinforce depth cues with “strong subject-background separation, creamy bokeh, background lights softly blooming.” For awkward framing, replace “subject slightly off-center” with “mid-chest crop, centered composition” to force a cleaner portrait crop. And if the rain becomes unrealistic (giant droplets or fog everywhere), scale it down with “light drizzle, subtle mist” rather than heavy rain language.
Frequently Asked Questions
Q1: Can I use this prompt for a full-body shot?
Yes replace “street portrait” with “full-body street portrait” and add “head-to-toe framing, natural stance, leading lines from sidewalk.”
Q2: How do I make it less neon and more natural night lighting?
Swap “neon signage” for “streetlights” and change the rim light to “soft warm rim light” with “cool ambient fill.”
Q3: What if the image looks too glossy or over-processed?
Keep “natural color grading” and add “subtle film grain, realistic tonal range” while removing any extra “hyper” or “glossy” terms you might have added.